|
|
| (26 tussenliggende versies door dezelfde gebruiker niet weergegeven) |
| Regel 1: |
Regel 1: |
| {{DISPLAYTITLE:LINUX HANDLEIDING}}
| |
|
| |
|
| | = Menu = |
|
| |
|
| ```bash
| | == Welkom bij mijn verzameling handleidingen: == |
| # cd /var/www/html/
| |
| # curl -LO https://files.phpmyadmin.net/phpMyAdmin/5.2.0/phpMyAdmin-5.2.0-all-languages.tar.gz
| |
| # tar xf phpMyAdmin-5.2.0-all-languages.tar.gz
| |
| # ln -s phpMyAdmin-5.2.0-all-languages phpMyAdmin
| |
| # vi /etc/httpd/conf.d/phpMyAdmin.conf
| |
| ==================================================
| |
| Alias /phpMyAdmin /var/www/html/phpMyAdmin
| |
|
| |
| <IfModule mod_rewrite.c>
| |
| RewriteEngine On
| |
| RewriteCond %{HTTPS} off
| |
| RewriteRule ^(.*)$ https://%{HTTP_HOST}%{REQUEST_URI} [L,R=301]
| |
| </IfModule>
| |
|
| |
|
| <Directory "/var/www/html/phpMyAdmin">
| |
| AllowOverride AuthConfig FileInfo Indexes Limit Options=Indexes,IncludesNOEXEC,MultiViews,SymLinksIfOwnerMatch,FollowSymLinks,None
| |
| Options -ExecCGI -Includes +IncludesNOEXEC
| |
| Require all granted
| |
| # Require all denied
| |
| # Require ip 10.0.36.0/24
| |
| <FilesMatch "\.(inc|php)$">
| |
| <If "-f %{REQUEST_FILENAME}">
| |
| AddHandler "proxy:unix:/var/opt/remi/php81/run/php-fpm/www.sock|fcgi://localhost" .inc .php
| |
| </If>
| |
| </FilesMatch>
| |
| </Directory>
| |
| ==================================================
| |
|
| |
|
| ```
| | Mijn kennis van Linux was beperkt, maar door gewoon veel dingen te proberen, leer je snel bij. |
|
| |
|
| Om gebruik te maken van phpMyAdmin moet je wel een database hebben.
| | Dit gaat het makkelijks als je de beschikking hebt over een (virtual)server of een account bij een grote partij waarbij je op eenvoudige wijze een linus server kunt gebruiken en/of aanmakem. |
|
| |
|
| Om deze te installeren doe je het volgende:
| | Ik heb in een thuis omgeving VMware ESXI draaien en kan op die manier snel nieuwe dingen uitproberen. |
|
| |
|
| ```
| | Als het dan helemaal fout gaat, kun je gewoon opnieuw beginnen. |
| sudo dnf install mariadb-server mariadb
| |
| ```
| |
|
| |
|
| Dependency Tree:
| | Ik was in de gelukkige omstandigheden dat ik een vraagbaak inde vorm van een goede vriend achter da hand had. |
|
| |
|
| ```
| | Hij heeft alle kennis in huis, en als ik er na twee dagen nog niet uit ben, vraag ik hem om mij op weg te helpen. |
| Transaction Summary
| |
| ================================================================================
| |
| Install 13 Packages
| |
|
| |
|
| Total download size: 18 M
| | Ook heeft hij een aantal best practice voorbeelden van installaties, die ik ook hier heb opgenomen. |
| Installed size: 107 M
| |
| Is this ok [y/N]: y
| |
| ```
| |
|
| |
|
| Once installed, start and enable MariaDB the service:
| | Ik heb alle topics apart van elkaar gedocumenteerd, en deze zijn eenvoudig via onderstaand menu te bekijken. |
| | - [[Menu|WireGuard]] |
|
| |
|
| ```
| | - [[Menu|WireGuard]] |
| sudo systemctl enable --now mariadb
| |
| ```
| |
|
| |
|
| Verify if the service is running:
| | - [[PhpMyAdmin]] |
|
| |
|
| ```
| | - [[Mariadb|MariaDB]] |
| $ systemctl status mariadb
| |
| ● mariadb.service - MariaDB 10.5 database server
| |
| Loaded: loaded (/usr/lib/systemd/system/mariadb.service; enabled; vendor preset: disabled)
| |
| Active: active (running) since Sat 2022-07-23 10:05:47 CEST; 2s ago
| |
| Docs: man:mariadbd(8)
| |
| https://mariadb.com/kb/en/library/systemd/
| |
| Process: 18153 ExecStartPre=/usr/libexec/mariadb-check-socket (code=exited, status=0/SUCCESS)
| |
| Process: 18175 ExecStartPre=/usr/libexec/mariadb-prepare-db-dir mariadb.service (code=exited, status=0/SUCCESS)
| |
| Process: 20589 ExecStartPost=/usr/libexec/mariadb-check-upgrade (code=exited, status=0/SUCCESS)
| |
| Main PID: 20448 (mariadbd)
| |
| Status: "Taking your SQL requests now..."
| |
| Tasks: 12 (limit: 23441)
| |
| Memory: 78.5M
| |
| CPU: 268ms
| |
| CGroup: /system.slice/mariadb.service
| |
| └─20448 /usr/libexec/mariadbd --basedir=/usr
| |
| ```
| |
|
| |
|
| ## #2. Using MariaDB on Rocky Linux 9|AlmaLinux 9
| | - [[Node-red]] |
|
| |
|
| Once installed MariaDB/MySQL databases can be used. First, secure the installation by setting a password for the root user.
| | - [[MQTT]] |
|
| |
|
| ```bash
| | - [[Wifi via commandline instellen]] |
| sudo mysql_secure_installation
| |
| ```
| |
|
| |
|
| Proceed as shown:
| | - [[Logging]] |
| On MariaDB:
| |
|
| |
|
| ```
| | - [[ReadonlyPi]] |
| NOTE: RUNNING ALL PARTS OF THIS SCRIPT IS RECOMMENDED FOR ALL MariaDB
| |
| SERVERS IN PRODUCTION USE! PLEASE READ EACH STEP CAREFULLY!
| |
|
| |
|
| In order to log into MariaDB to secure it, we'll need the current
| | - [[Cronjobs]] |
| password for the root user. If you've just installed MariaDB, and
| |
| haven't set the root password yet, you should just press enter here.
| |
|
| |
|
| Enter current password for root (enter for none): Press_Enter
| | - [[Linux commands]] |
| OK, successfully used password, moving on...
| |
| | |
| Setting the root password or using the unix_socket ensures that nobody
| |
| can log into the MariaDB root user without the proper authorisation.
| |
| | |
| You already have your root account protected, so you can safely answer 'n'.
| |
| | |
| Switch to unix_socket authentication [Y/n] y
| |
| | |
| You already have your root account protected, so you can safely answer 'n'.
| |
| | |
| Change the root password? [Y/n] y
| |
| New password:
| |
| Re-enter new password:
| |
| Password updated successfully!
| |
| .....
| |
| Remove anonymous users? [Y/n] y
| |
| ....
| |
| Disallow root login remotely? [Y/n] y
| |
| ...
| |
| Remove test database and access to it? [Y/n] y
| |
| ....
| |
| Reload privilege tables now? [Y/n] y
| |
| All done! If you've completed all of the above steps, your MariaDB
| |
| installation should now be secure.
| |
| | |
| Thanks for using MariaDB!
| |
| ```
| |
| | |
| Now login using the created root password:
| |
| | |
| ```
| |
| $ mysql -u root -p
| |
| Enter password:
| |
| Welcome to the MySQL monitor. Commands end with ; or \g.
| |
| Your MySQL connection id is 10
| |
| Server version: 8.0.28 Source distribution
| |
| | |
| Copyright (c) 2000, 2022, Oracle and/or its affiliates.
| |
| | |
| Oracle is a registered trademark of Oracle Corporation and/or its
| |
| affiliates. Other names may be trademarks of their respective
| |
| owners.
| |
| | |
| Type 'help;' or '\h' for help. Type '\c' to clear the current input statement.
| |
| | |
| mysql>
| |
| ```
| |
| | |
| ```
| |
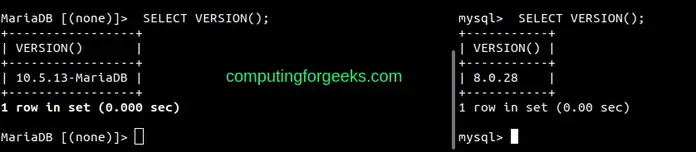
| mysql> SELECT VERSION();
| |
| ```
| |
| | |
| Sample Output:
| |
| | |
| 
| |
| | |
| ### Create a User and Database:
| |
| | |
| To create a user and database in MariaDB/MySQL, use the commands below replacing where required:
| |
| | |
| ```
| |
| CREATE DATABASE sampledb;
| |
| CREATE USER 'test_user'@'%' IDENTIFIED BY 'Passw0rd';
| |
| GRANT ALL ON sampledb.* TO 'test_user'@'%' WITH GRANT OPTION;
| |
| FLUSH PRIVILEGES;
| |
| ```
| |
| | |
| After this, you will have a database named **sampledb** and a user **test_user** who can be accessed remotely created as swell.
| |
| | |
| Check the available databases:
| |
| | |
| ```
| |
| mysql> SHOW databases;
| |
| +--------------------+
| |
| | Database |
| |
| +--------------------+
| |
| | information_schema |
| |
| | mysql |
| |
| | performance_schema |
| |
| | sampledb |
| |
| | sys |
| |
| +--------------------+
| |
| 5 rows in set (0.00 sec)
| |
| | |
| mysql>
| |
| ```
| |
| | |
| View users:
| |
| | |
| ```
| |
| mysql> SELECT User, Host FROM mysql.user;
| |
| +------------------+-----------+
| |
| | User | Host |
| |
| +------------------+-----------+
| |
| | test_user | % |
| |
| | mysql.infoschema | localhost |
| |
| | mysql.session | localhost |
| |
| | mysql.sys | localhost |
| |
| | root | localhost |
| |
| +------------------+-----------+
| |
| 5 rows in set (0.00 sec)
| |
| | |
| mysql>
| |
| ```
| |
| | |
| To delete a user, use the command with the below syntax:
| |
| | |
| ```
| |
| DROP USER 'username'@'host';
| |
| ```
| |
| | |
| ### Create Tables
| |
| | |
| We can then create and insert data into a table. For example in the created table above:
| |
| | |
| ```
| |
| USE sampledb;
| |
| | |
| CREATE TABLE playground (
| |
| equip_id serial PRIMARY KEY,
| |
| type varchar (50) NOT NULL,
| |
| color varchar (25) NOT NULL,
| |
| location varchar(25) check (location in ('north', 'south', 'west', 'east', 'northeast', 'southeast', 'southwest', 'northwest')),
| |
| install_date date
| |
| );
| |
| ```
| |
| | |
| Insert the data into the preferred table:
| |
| | |
| ```
| |
| INSERT INTO playground (type, color, location, install_date) VALUES ('slide', 'blue', 'south', '2017-04-28');
| |
| INSERT INTO playground (type, color, location, install_date) VALUES ('swing', 'yellow', 'northwest', '2018-08-16');
| |
| ```
| |
| | |
| View the added data:
| |
| | |
| ```
| |
| mysql> SELECT * FROM playground;
| |
| +----------+-------+--------+-----------+--------------+
| |
| | equip_id | type | color | location | install_date |
| |
| +----------+-------+--------+-----------+--------------+
| |
| | 1 | slide | blue | south | 2017-04-28 |
| |
| | 2 | swing | yellow | northwest | 2018-08-16 |
| |
| +----------+-------+--------+-----------+--------------+
| |
| 2 rows in set (0.00 sec)
| |
| | |
| mysql> exit
| |
| ```
| |